How To Floss
 As a hygienist, I always encourage patients to floss. Not to add another box to check on a to do list, but because flossing or using another dental aid to clean between your teeth is the only way to reach the bacteria making it’s home there. A toothbrush or rinse just cannot get in between your teeth, which is where we generally see the most tartar build up and the deepest periodontal pockets.
We not only want you to floss, but we want you to do it the right way! Flossing the “wrong” way can overcomplicate things, take extra time, miss plaque, and actually cause damage to the gums.
The first step in the right direction is getting floss that you will use, and that works well with your smile. Your hygienist can help you pick a floss that won’t shred and will be best for you. The next step is get to flossin’!
Below we included a step-by-step guide that the ADA published on mouthhealhty.org that sums it up perfectly!
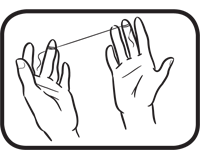 Break off about 18 inches of floss and wind most of it around one of your middle fingers. Wind the remaining floss around the same finger of the opposite hand. This finger will take up the floss as it becomes dirty.
 Hold the floss tightly between your thumbs and forefingers.
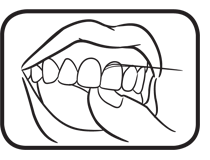 Guide the floss between your teeth using a gentle rubbing motion. Never snap the floss into the gums.
 When the floss reaches the gum line, curve it into a C shape against one tooth. Gently slide it into the space between the gum and the tooth.
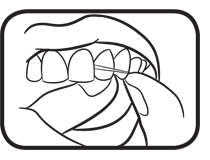
 Hold the floss tightly against the tooth. Gently rub the side of the tooth, moving the floss away from the gum with up and down motions. Repeat this method on the rest of your teeth. Don’t forget the back side of your last tooth.
Next time we will talk about more tools you can use to clean between teeth in those tricky areas!
Blog Post Author

Karissa Barker BSDH | Contributor
Spokane Dental